
mmmmm
a must try

mmmmm
a must try
250g 70% cocoa chocolate
250g unsalted butter
300g golden caster sugar
3 large eggs, plus 1 extra egg yolk, lightly beaten
60g plain flour
½ tsp baking powder
Pinch of salt
60g good quality cocoa powder
100g walnuts (optional)
1. Pre-heat the oven to 180C, and line a 23cm x 23cm baking tin with baking parchment.
2. Set a bowl over, but not touching, a pan of simmering water, and add 200g of the chocolate, broken into pieces. Allow to melt, stirring occasionally, and then remove from the heat immediately.
3. Meanwhile, beat the butter and sugar together until light and fluffy, and break the rest of the chocolate into chips.
4. With the mixer still running, gradually add the eggs, beating well between each addition to ensure it’s thoroughly incorporated before pouring in any more. Leave mixing on a high speed for five minutes until the batter has a silky sheen, and has increased in volume.
5. Remove the bowl from the mixer, and gently fold in the melted chocolate and chocolate chips with a metal spoon, followed by the sifted flour, baking powder, salt, cocoa powder and walnuts.
6. Spoon the mixture into the tin, and bake for 30 minutes. Test with a skewer; it should come out sticky, but not coated with raw mixture. If it does, put it back into the oven for another 3 minutes, then test again. Prepare a roasting tin of iced water.
7. When the brownies are ready, remove the tin from the oven and place in the cold water bath. Leave to cool for an hour before cutting into squares. Store in an air-tight container; they’re even better the next day.

want the recipe ?
go to http://www.facebook.com/whiskmeawayrecipes
and when i get100 likes i will post it
NOW THAT YOU HAVE LEARNED THE BASICS LETS LEARN HOW TO MAKE FRENCH
Ingredients
1 cup confectioners’ sugar, 4.5 oz
3/4 cup almond flour, 2.5 oz. (I’ve made my own by processing almond slivers, but just buying it is simpler)
2 large egg whites, room temperature (no farm fresh eggs! older eggs hold air better, and take them from the fridge the day before or the morning of and let them sit there happily on the counter and warm to room temp)
Pinch of cream of tartar
1/4 cup superfine sugar, 1.5 oz. (also called baker’s sugar, I’ve read you can make your own by processing granulated sugar, but have never tried it)
3/4 cup seedless raspberry jam, for filling
Method
1. Pulse confectioners’ sugar and almond flour in a food processor until combined. Sift mixture 2 times. (I found sifting with my usual flour sifter near impossible. The almond flour caked under the sifting hand and balled up over it. Instead I sifted with a simple bowl-shaped sieve.)
2. Whisk whites with a mixer on medium speed until foamy. Add cream of tartar, and whisk until soft peaks form. Reduce speed to low, then add superfine sugar. Increase speed to high, and whisk until stiff peaks form (the recipe suggests 8 minutes, for me it took only 3 to 4 minutes, take care not to over-whip). If you’re going to add color, I added food coloring towards the end of whipping my whites. I found I could use standard, water-based food coloring. Several of the recipes I saw recommended paste food coloring, but I didn’t have any at the time, so I went out on a limb! The water-based colors worked just fine.
3. Sift flour mixture over whites, and fold until mixture is smooth and shiny. I found the amount of folding to be crucial. Fold too little, and your macaron shells will have peaks instead of nice rounded caps. Fold too much, and your meringue will drip into a mess of wafer-thin blobs. Tartlette recommends about 50 folds, until your batter has a magma-like flow. For me about 65 folds was just right. I find the batter has a little of a soft-toffee like sheen when it is ready. (UPDATE 02.10: stop by here to read about a macaron class Tartlette taught). You can test a daub on a plate, and if a small beak remains, turn the batter a couple times more. If the batter forms a round cap but doesn’t run, it is just right. When I spooned my batter into the pastry bag, the perfect batter started to just ooze out of the tip once the bag was full. If it stayed stiff inside the bag it was too stiff, if it dripped out too fast the batter was too runny. I found that doubling the recipe made this step very difficult for me, I found I would over fold to incorporate the flour mixture and I would end up with a runny batter.
4. Transfer batter to a pastry bag fitted with a 1/2-inch plain round tip.
5. Pipe 3/4-inch rounds 1 inch apart on parchment-lined baking sheets. I put the tip right in the middle of where I wanted each macaron and let the batter billow up around it, then I drug the tip to the side of the round. (You can pipe 1-inch to 2-inch rounds, but you will need to add cooking time). Tap bottom of each sheet on work surface to release trapped air. Let stand at room temperature for 30 to 45 minutes. (Different recipes recommend anywhere from no rest time to 2 hours rest time. I was most happy with 30 to 45 minutes rest time, once the caps looked more dull and had formed a slight skin, so that during baking the macaron could puff up beneith that skin and form that pretty “foot” at the bottom.) While they’re resting, preheat oven to 375 degrees.
6. Reduce oven temperature to 325 degrees. Bake 1 sheet at a time, rotating halfway through, until macarons are crisp and firm, about 10 minutes. After each batch, increase oven temperature to 375 degrees, heat for 5 minutes, then reduce to 325 degrees. Every oven is different, so you may need to play with your oven temperature. The tops of the macaron shells should not brown.
7. Let macarons cool on sheets for 2 to 3 minutes, then transfer to a wire rack. If macarons stick, spray water underneath parchment on hot sheet. The steam will help release macarons (if this doesn’t work, see below, under “troubleshooting”).
8. Sandwich 2 same-size macarons with 1 teaspoon jam. Serve immediately, or stack between layers of parchment, wrap in plastic, and freeze for up to 3 months. It takes only 30 minutes out of the freezer for macarons to be ready to serve.

mmmmmmmmmmmmmmmmm!

yyyyyyyyuuuuuuuuuuuuuuuuuummmmmmmmmmmmmmm! and purely veg!
For althose who are purely veg I am giving away my most favorite recipe so enjoy!
Ingredients
1 1/4 cups plain flour (maida)
1 1/2 tsp baking powder
1/2 tsp soda bi-carb
3/4 cup condensed milk
4 tbsp melted butter
1 tsp vanilla essence
4 tbsp salted cream cheese

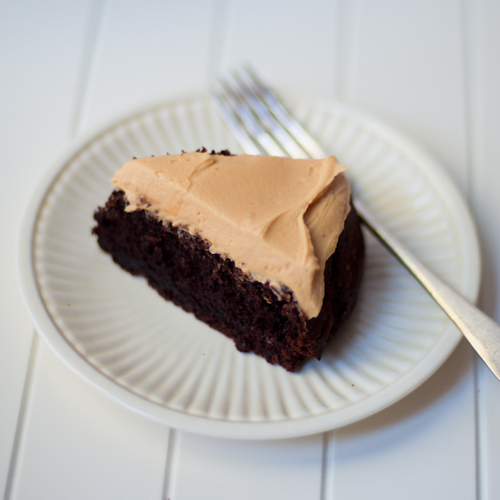
chocolate cake is basically a sponge with cocoa or melted chocolate .Today i am going to teach you how to make the best chocolate cake :devil’s!!!
ingredients:
chocolate glaze
Preheat oven to 160°C (325°F). Grease a 22cm cake tin. Place the butter and sugar in the bowl of an electric mixer and beat until light and creamy. Add the eggs and beat well. Sift the flour, baking powder and cocoa over the butter mixture, add the sour cream and chocolate, and mix until just combined. Pour the mixture into the tin and bake for 55 minutes–1 hour or until just set. Cool in the tin. To make the chocolate glaze, combine the chocolate and cream in a saucepan over low heat and stir until smooth. Allow the glaze to stand for 5 minutes before spreading over the top of the cake. Serves 8–10.
|
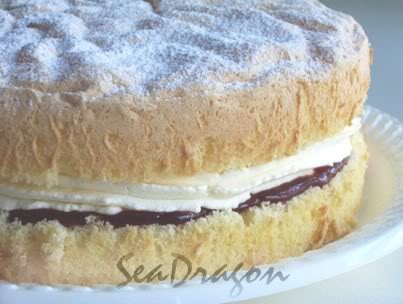
looks elegant but is simple!!!
(type ‘sponge cake in search to view recipe!!)
 250g butter